
Born
(Learning)
To Run
Before we worry about running further or faster, let's spend a little time learning how to run better.
NOTE: A one-on-one video session with Brad Pamp will further improve your understanding of your optimum running stride.
IMPORTANT: This program relates to technically improving your running economy — not output such as heart rate, speed, pacing or distance.
You Already Know How To Run
When physically able, I know you can run.
In fact, you probably worked that out somewhere around 10–18 months of age.
Then you ran everywhere.
Nobody gave you a running program. Nobody discussed cadence, foot strike, ground-contact time or overstriding.
You just ran.
Then somewhere along the way, usually as an adult, you decided to use running — and yes, that includes jogging and shuffling — as a form of exercise.
And good for you.
You bought some shoes. Perhaps downloaded an app. Maybe entered a fun run.
And you started adding kilometres.
Then Something Started Talking
For plenty of runners, something eventually starts talking back.
Damn It.
A niggle became a strain.
A strain became an injury.
Your good intentions were suddenly derailed.
Before running further or faster, let's learn how to run better.
So, What Are We Doing Here?
This program is about developing a running skillset.
We are going to practise running as biomechanically efficiently as your body allows.
We want to reduce the cost of impact — stride after stride after stride.
More of the workload through your motor. Less unnecessary punishment through your chassis.
Running is a rhythmic, repetitive and continuous movement. One stride looks remarkably similar to the next.
A slightly inefficient movement performed once probably doesn't matter.
Perform it 5,000 times?
Different story.
If your running mechanics continually place unnecessary load through one particular area, you might get away with it today. You might get away with it for months.
But eventually your weakest link may put its hand up.
This Is Not A Hard Running Program
In fact, initially, it's deliberately conservative.
We're not chasing exhaustion.
We're not chasing kilometres.
We're not chasing Strava numbers.
We're chasing skill.
We're laying down a movement foundation so that, when the time is right, we can safely start exploring what your engine can actually do.
I've broken that process into four simple phases.
Posture
Before we run, we'll work on how you organise your body.
Nothing exaggerated. We simply want to put the body in a better position to move.
Key Points
Practice
Practise these pre-run exercises for approximately 4–8 weeks.
Load: Safely manageable with effort. As an example, I'm using a 10 kg pair.
Rest: 10 seconds.
Format: Circuit style × 3.
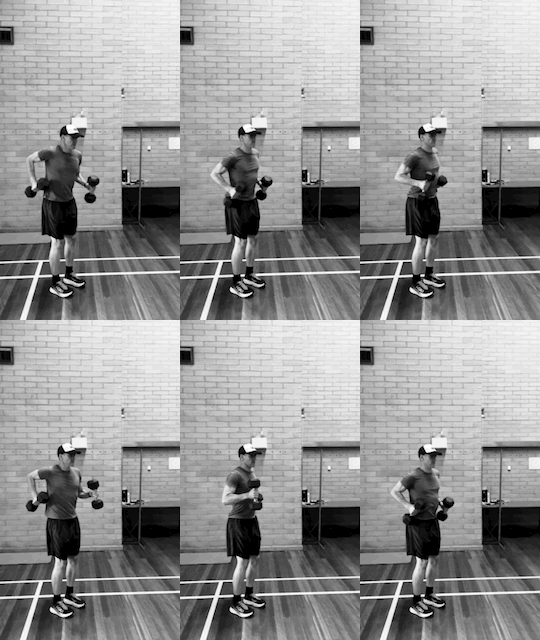
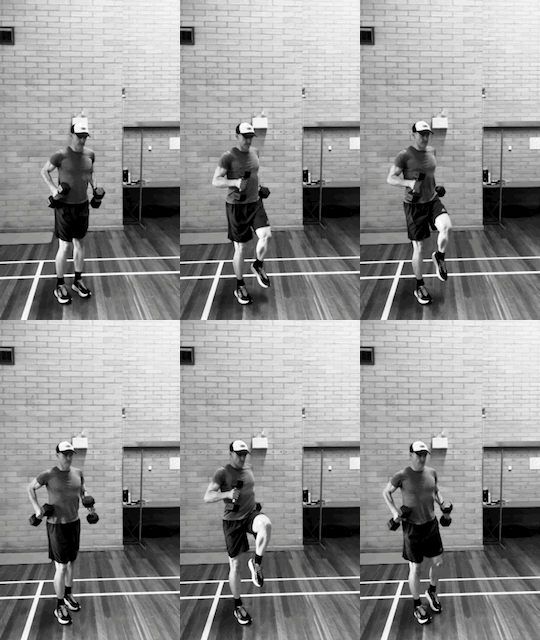
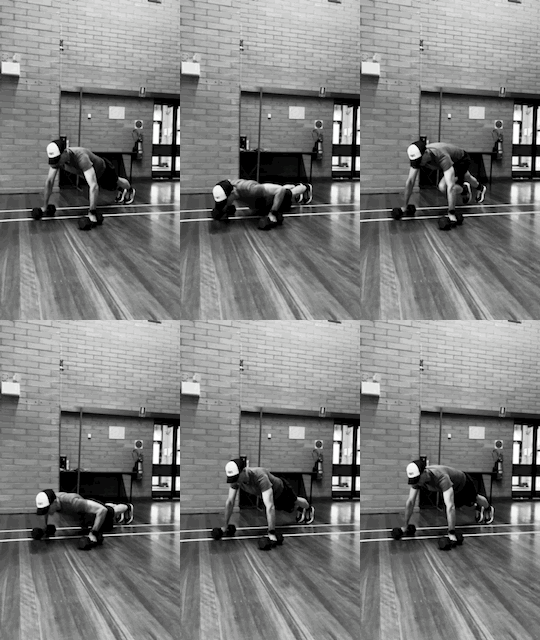
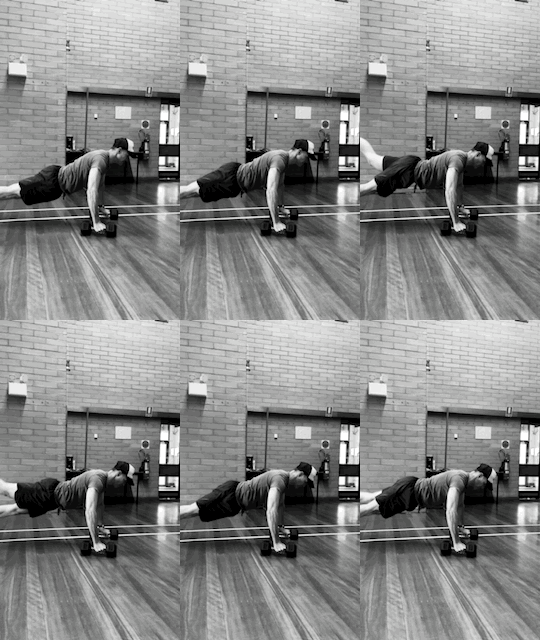
These exercises simply prompt the muscles to help hold your running shape — particularly as you become tired.
Phase One becomes particularly valuable later in a run when fatigue naturally starts pulling your optimum running posture apart.
Shorten The Stride
Baby steps.
Reduce the temptation to reach forward for the ground. Less reaching. Less braking. Less unnecessary impact.
Key Points
Don't Chase A Forefoot Strike
The goal isn't to manufacture an exaggerated forefoot landing.
Deliberately forcing yourself onto the balls of your feet can unnecessarily increase loading through the calf and Achilles.
Our bigger goal is much simpler: stop reaching forward.
Practice
At your super-easy intensity, simply become conscious of taking slightly shorter strides than you would normally practise.
Where appropriate, integrate two or three short sessions on grass using bare feet.
Your first barefoot exposure may be as little as 5 minutes.
Gradually increase the exposure across the next 4–8 weeks as your feet and lower legs adapt.
Cadence
Now we introduce rhythm.
Practise — don't train — landing with the beat.
Touch. Support. Gone.
Cadence gives us another tool to help control stride length and reduce the tendency to spend too long sitting on the supporting leg.
We're looking for a lighter, quicker exchange with the ground.
Cadence practice can also help reduce excessive vertical oscillation — unnecessary up-and-down movement.
The more unnecessary height you create, the more your body has to control when you return to earth.
Key Points
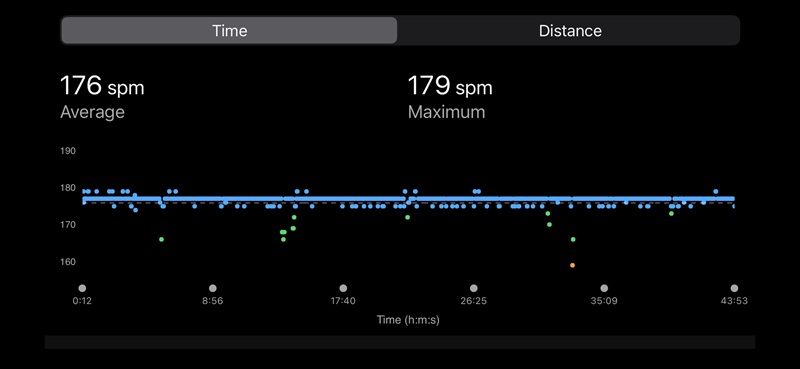
My Preference
I've tuned prominent bass-driven house music to approximately 88 beats per minute.
That gives me one beat for the same foot rather than trying to process 176 separate cues every minute.
I've also found my running focus is often better without lyrics. I simply hear the beat and let the stride settle around it.
Practice
The easiest option is to open YouTube and search for a simple drum beat or metronome at your chosen BPM.
There are also countless free metronome apps and inexpensive clip-on metronomes.
If you dislike sound, vibration-based rhythm devices can also provide a physical cue at your selected beat.
Start gently.
You might begin well below your eventual cadence target, become comfortable with the concept, then gradually increase the rhythm until you find your own sweet spot.
Begin with approximately 5 minutes of cadence focus and progressively extend the time across 4–8 weeks.
Lift The Supporting Foot
This is a big one.
Think less about pushing backwards. Think more about getting the supporting foot away from the ground.
Key Points
Don't Push The Ground Away
Rather than consciously pushing the landing foot hard into the ground — then pushing harder in an attempt to drive the body forward — we'll practise a different thought.
Get the supporting foot off the ground.
Think more about lifting or pulling the foot away from the surface and allowing the next stride to happen.
We're developing a skill.
Not forcing a stride.
Practice
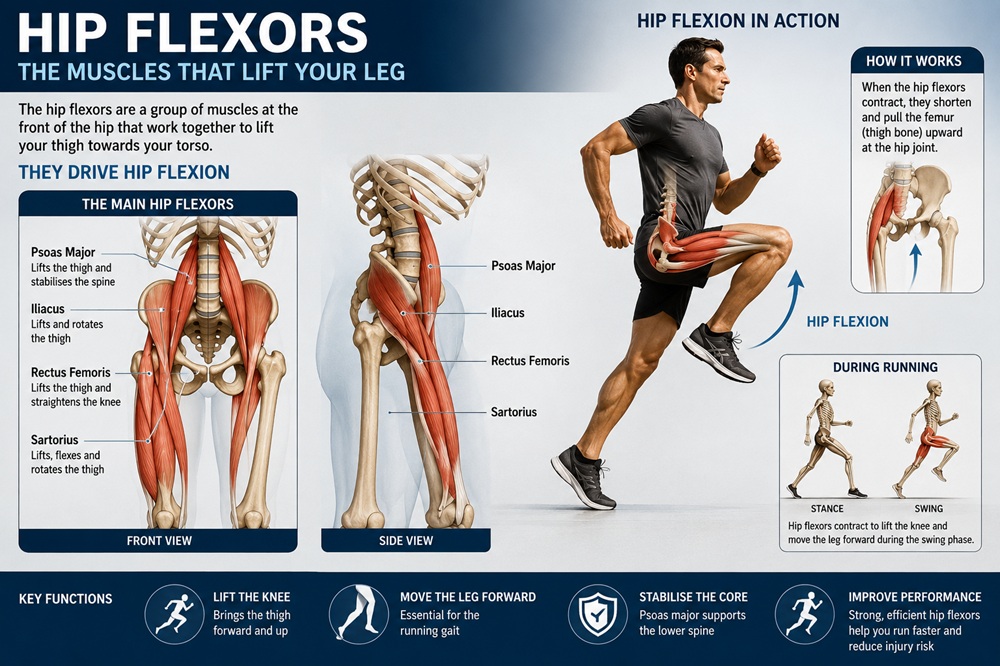
Etch the hip-flexor region and its hip-flexion action into your mind.
When running, visualise this region helping bring the recovering leg forward.
I've found that even audibly saying “lift, lift, lift” each time the foot contacts the surface can be an incredibly effective cue.
Eventually, when you find the sweet spot, the brain starts organising the recovery before you've consciously had time to think about it.
Practise this mindset particularly when you're tired and your legs begin to feel heavy.
And That's It.
Four phases.
We learn them.
We practise them.
We test them.
We repeat them until you don't have to think about them quite so much anymore.
Because ultimately I don't want you running around thinking about twelve different technical cues.
I want the skill to become increasingly automatic.
And once we've built that foundation, then we can start exploring distance.
Then speed. Then hills. Then performance. Then perhaps some mega miles.
Let's learn to run.